Why Build Farmhouse Chairs?
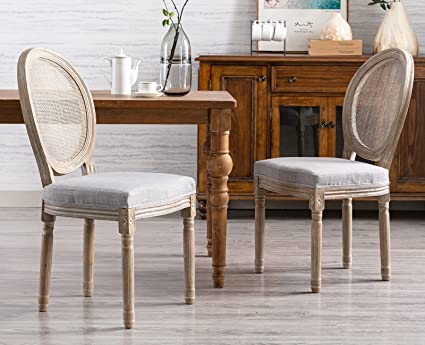
Building your own farmhouse chairs is a great way to add character and charm to your home. Not only are these chairs stylish, but they are also affordable and easy to build. With a few basic tools and materials, you can create a one-of-a-kind piece that will complement any room in your home.
Farmhouse chairs are perfect for adding extra seating to the kitchen or dining room, or even using as accent pieces in the living room or bedroom. You can customize them with different colors and fabrics to match the existing decor of your space.
Building farmhouse chairs is also a great way to relax, get creative, and have fun while creating something special for your home. Best of all, when you’re done you’ll have a beautiful piece that you can be proud of!
Preparing Your Materials
Before you begin building your farmhouse chair, it’s important to make sure you have all of the necessary tools and materials. Start by gathering the wood and hardware needed for the project. You will need two pieces of hardwood for the seat and backrest, two pieces of softwood for the arms, and four pieces of hardwood for the legs.
Additionally, you’ll need screws, dowels, glue, sandpaper, a saw, drill, and a hammer. Once you’ve gathered all of your materials, you can start prepping them for assembly. Start by cutting each piece to size using a saw or jigsaw. Then sand down any rough edges or splinters before drilling pilot holes into every piece that will require screws.
Finally, apply wood glue to each joint before screwing in place with a drill or hammer. Now that your materials are prepped and ready to go, you’re ready to begin building your farmhouse chair!
List of Tools Needed
Building a farmhouse chair is an exciting project, but it’s important to make sure you have all the right tools before getting started. Here’s a list of tools you’ll need to complete the job: saw (jigsaw or circular saw), drill, screwdriver, hammer, dowel jig, sandpaper, glue, and clamps.
Depending on the type of wood you choose for your project and any extras you want to add, such as armrests or decorative trim, you may need additional supplies.
Additionally, safety glasses are a must for protecting your eyes during the build. Having the right tools will help ensure that your project goes smoothly and that you’re able to build a sturdy and beautiful farmhouse chair for your home.
Selecting the Right Wood for Your Chairs
Choosing the right type of wood for your farmhouse chair project is an important step in creating a beautiful and sturdy piece of furniture. There are many different types of wood to choose from, each with its own unique characteristics.
Hardwoods such as oak, walnut, and cherry are strong and durable, making them ideal for furniture that will receive regular use. Softwoods like pine or cedar can also be used for chairs, but they may not last as long under heavy use.
If you plan to paint or stain your chairs, consider using a plywood material instead of solid wood; it’s less expensive than hardwood but just as sturdy. Additionally, make sure you select wood that is free from knots, cracks, and other imperfections that could weaken its strength over time. With the right wood selection process and attention to detail during the build process, you’ll create a beautiful set of farmhouse chairs that will last for years to come!
Selecting Hardware and Accessories for Your Chairs

When it comes to selecting hardware and accessories for your farmhouse chairs, there are a few things to keep in mind. Start by thinking about what kind of look you want to achieve; do you want a rustic, vintage feel or something more contemporary? Once you’ve decided on the overall style, it’s time to choose the right type of hardware.
For example, if you’re building a more traditional-style chair, consider using wooden pegs or mortise-and-tenon joinery with metal hinges. If you’re looking for something more modern, consider using metal screws or bolts with plastic caps for a sleek finish.
Finally, don’t forget about the finishing touches! Choose coordinating fabrics for the cushions and consider adding decorative elements like trim or tassels for an extra touch of charm. With careful selection and thoughtful installation of hardware and accessories, your beautiful farmhouse chairs will be ready to use in no time!
Calculating Amounts of Glue, Paint and Finishing Supplies Needed
Calculating how much glue, paint and other finishing supplies you need for your farmhouse chairs can be tricky. To make sure you don’t run out halfway through the project, it’s important to plan ahead and figure out exactly what you’ll need. Start by taking measurements of the chair frame in all directions—length, width, and height—and multiply them together to get the total volume of glue needed.
Then, measure the area of each surface that needs painting, add them together and multiply that number by two to get the total amount of paint required. Finally, consult with your supplier to determine how much finishing product is necessary for a professional-looking finish. With proper planning and calculation you can ensure that you have an adequate amount of material on hand when it comes time to build your beautiful farmhouse chairs!
Building the Frame of the Chair
Once you’ve gathered the necessary materials, it’s time to begin building your farmhouse chair frame. Start by cutting four pieces of wood that will act as the legs and back support of the chair. Then, use glue and screws to connect them together into a frame shape.
It’s important to make sure that all pieces are level and square before continuing with assembly. Finally, attach the seat slats by nailing them into the frame from underneath. Once this is complete, you can move on to sanding, painting and staining your chair if desired. With a little patience and effort you can have a beautiful custom-built piece of furniture in no time!
Measuring and Cutting the Pieces of Wood to Size
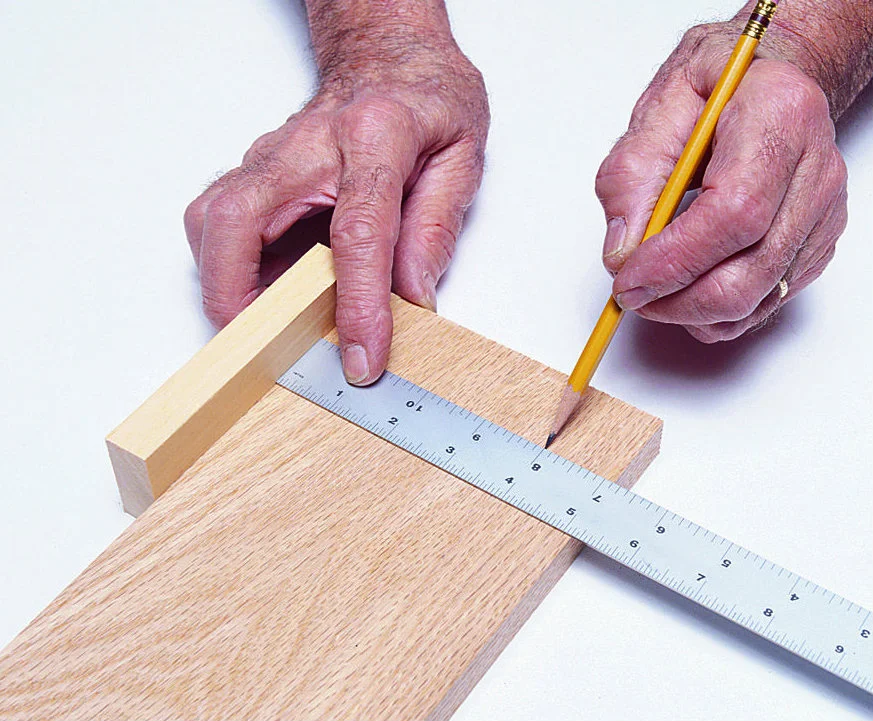
The next step to building your farmhouse chair frame is measuring and cutting the pieces of wood to size. Start by measuring out each piece of wood against the frame design. For best results, use a tape measure and mark the measurements with a pencil. Then, use a saw or jigsaw to cut the pieces to their designated measurements.
Make sure to be extra precise when measuring and cutting as any mistakes here can affect how well the entire chair fits together later on. It’s also important to wear safety goggles and gloves during this process for your own protection. Once all of the pieces have been measured and cut, you’re ready to begin assembling your farmhouse chair!
Connecting the Pieces Together With Glue
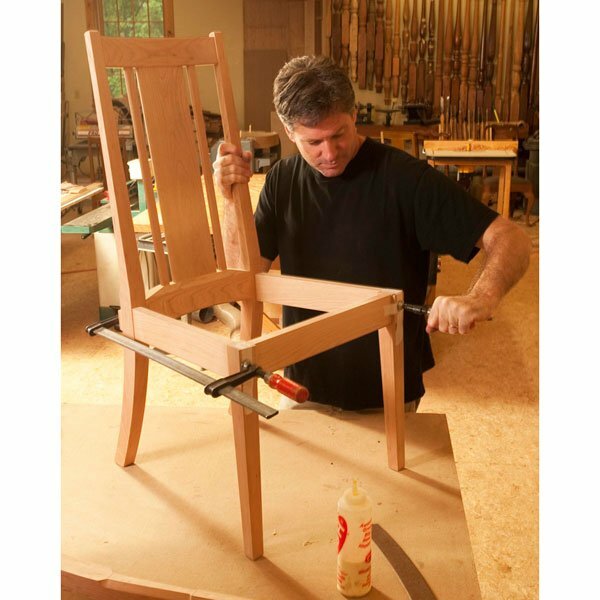
The next step in building your farmhouse chair is connecting the pieces together with glue. Start by applying a thin layer of wood glue to the back side of each piece. Then, use clamps or weights to hold them in place while the glue dries.
For best results, use clamps that are made for woodworking and make sure all the pieces line up correctly before clamping them together. Once the glue has dried completely, you can move on to screwing in the hardware for extra strength and stability.
Make sure to pre-drill any holes needed for screws so as not to split the wood when inserting them. The last step is sanding and staining your farmhouse chair frame, giving it a beautiful finish that will last for years!
Securing Joints with Brackets or Nails
Once the glue has dried, securing the joints with either brackets or nails is the next step in building your farmhouse chair. Brackets are a great option for adding extra stability to the frame and can be purchased from any hardware store. Start by drilling pilot holes into both sides of the joint and then use screws to attach them.
Alternatively, you can also use nails for joining pieces together. Start by pre-drilling a hole slightly smaller than the nail, then insert it and hammer until it’s flush with the frame surface. Whichever option you choose, make sure that all of your joints are secure before moving on to the next step!
Sanding Down Any Rough Edges or Imperfections
Once the frame is constructed, it’s important to go back and sand down any rough edges or imperfections. Start by using a medium-grit sandpaper for smoothing out rough surfaces, then switch to a finer grit for getting rid of any remaining marks.
Make sure to use a damp cloth to wipe away dust particles before moving on to the next step. Sanding your frame will not only make it look better, but also provide a smoother surface for applying stain or paint later on. Take your time while sanding, as this step can be laborious but is essential in creating the perfect farmhouse chair!
Adding Legs and Hardware to Your Chair Frame
Adding legs and hardware to your chair frame is the next step in crafting a beautiful farmhouse kitchen chair. Begin by measuring the height of your frame, then cut four pieces of wood for the legs that match this measurement.
Use wood glue to attach the legs securely to each corner of the frame, making sure they are level and even. When it comes to hardware, choose from decorative screws or nails- whichever best suits your desired look.
Hammer them into place on each corner of the chair frame for added stability and an aesthetically pleasing finish. Finally, use wood filler to fill in any gaps between the joints of your frame and legs for a seamless appearance. With these steps completed, you can now move on to staining or painting your new chair!
Choosing Appropriate Length Legs for Your Chair
Choosing the right length legs for your chair is a critical step in crafting a beautiful farmhouse kitchen chair. First, you’ll need to measure the height of your frame and use it as a guide for determining how long your legs should be. If you want your chair to have a higher seat, choose longer legs.
Conversely, if you’d like a lower seat, select shorter legs. Be sure to always measure twice before cutting- this will ensure that all four of the legs are even and level when attached to the frame.
When shopping for replacement legs or hardware at a home improvement store, consider bringing along one of the original pieces from your chair so that you can match sizes accurately and easily. With appropriate length legs selected, you can now move on to staining or painting your new chair!
Attaching Legs to Chair Frame with Screws or Bolts
Attaching legs to your chair frame with screws or bolts is an important step in the process of crafting a beautiful farmhouse kitchen chair. Begin by pre-drilling holes into the frame where you’ll be attaching the legs. This will make it easier to secure the bolts or screws later on.
If you’re using screws, make sure that they are long enough to penetrate through both layers of wood and have a wide enough head to hold the leg in place securely.
When using bolts, be sure to select ones that match up with your pre-drilled holes and that also come with appropriate washers and nuts for securing them in place. Finally, use a screwdriver or wrench to tighten down each bolt or screw until it is firmly secured in place. With this step complete, your chair frame is now ready for staining or painting!
Finishing Touches on Your Farmhouse Kitchen Chairs
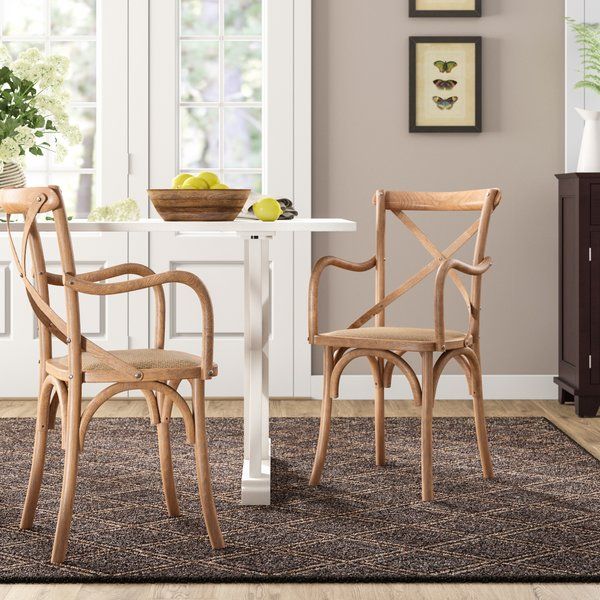
Finishing touches on your farmhouse kitchen chairs are the perfect way to add a personal touch to your furniture. After the legs have been attached, you can begin to stain or paint the frame. For a more rustic look, consider using a dark wood finish with distressing techniques applied in order to give the chair an aged look.
If you prefer a more modern feel, choose a light colored paint and apply it evenly over the frame for a crisp finish. To complete the look, add decorative hardware such as knobs or handles that match your décor.
Finally, use upholstery fabric to cover the seat and back of the chair for added comfort and style. With these finishing touches complete, your farmhouse kitchen chairs will be ready to enjoy for years to come!
Applying a Coat of Paint (Optional)
Painting your farmhouse kitchen chairs is an optional step to give them a personal touch. Before you begin, be sure to sand the chair frame and apply a primer to ensure proper adhesion of the paint. Choose a color that matches or complements your existing décor for a cohesive look.
Once you have selected the right shade, use a brush or roller to apply the paint evenly in thin layers. Allow each layer to dry fully before moving on to the next one.
To protect your chairs from daily wear and tear, it’s important to apply a top coat of sealant such as polyurethane or varnish after painting has been completed. This will help keep the paint looking fresh for years and make it easier to clean spills and messes off of the chairs’ surfaces.
Putting It All Together: Final Assembly and Placement
Putting it all together is the final step in creating your own farmhouse kitchen chairs. Begin by screwing the chair frame to the seat base, and then attach the backrest to the frame.
Once assembly is complete, you may want to add cushions or upholstery to your chair seats for added comfort and support. Measure out a piece of fabric that fits snugly over the seat base, allowing enough extra material to wrap around and secure with staples underneath.
Make sure that all edges are smooth and even before fixing into place. Finally, place your newly built chairs around your kitchen area – in a nook, against a wall or at an island – for a charming look that will last for years to come.
Tips for Maintaining and Enjoying Your New Chairs
Maintaining and enjoying your new farmhouse kitchen chairs over time requires a bit of effort, but the results are well worth it. Keep your chairs looking like new by regularly dusting and cleaning with a damp cloth.
Avoid harsh chemicals and abrasive materials that could damage the wood surface. Cushions or upholstery can also be cleaned using a mild detergent and warm water. When not in use, keep chairs covered to protect them from dirt and dust buildup.
Decorating around your farmhouse kitchen chairs is easy when you choose pieces that complement the classic farmhouse style. Hang curtains in classic prints like gingham, plaid or stripes for an inviting atmosphere, or place a decorative quilt or woven throw on the back of each chair for a cozy look.
Add extra charm with rustic pottery, vintage cookbooks and other charming accessories to complete the look. With a few simple touches, you can transform any kitchen into an inviting space that’s sure to be enjoyed for years to come!
Conclusion
Crafting your own farmhouse kitchen chairs can be a rewarding experience, while also providing you with an opportunity to add a personal touch to your home. With the right supplies and a little bit of patience, you can build beautiful chairs that will stand the test of time.
Additionally, by maintaining your chairs and decorating around them with complementary pieces, you can create an inviting atmosphere in any kitchen. Whether you’re looking to give your space a rustic feel or just add some extra charm, crafting your own farmhouse kitchen chairs is sure to be a rewarding endeavor!