What is Farmhouse Paint?
Farmhouse paint is a type of paint that has been specifically formulated for use on wood furniture and cabinets, giving them a rustic, farmhouse-style look. It typically consists of two coats of paint, with the first coat being a primer and the second coat being a topcoat.
The primer helps to ensure that the paint adheres properly to the surface and also helps to prevent staining and other damage from occurring. The topcoat provides protection from moisture and dirt, as well as providing an attractive finish. Farmhouse paint is available in various finishes including satin, matte, semi-gloss, and glossy. It’s important to select the right type of finish for your specific project in order to achieve the desired effect.
Benefits of Farmhouse Paint
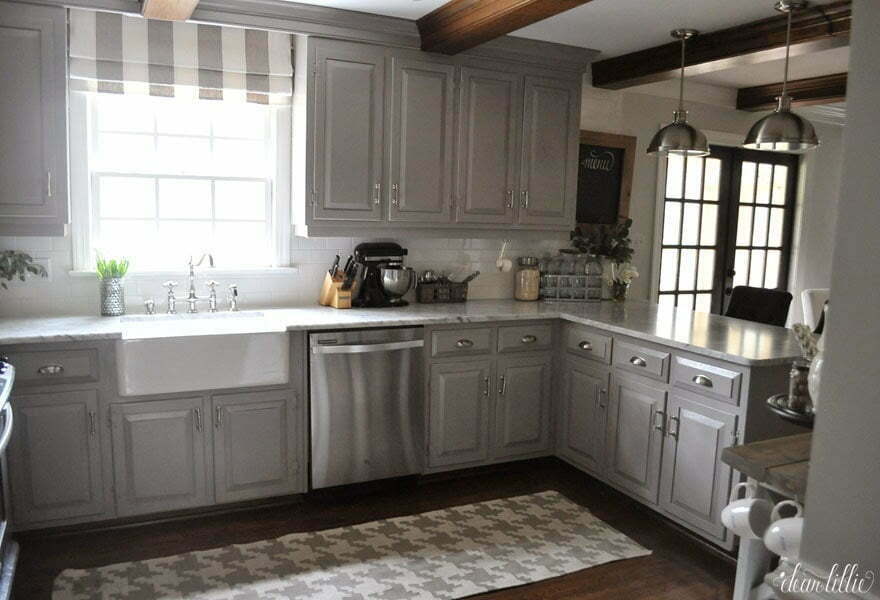
Farmhouse paint is an ideal choice for kitchen cabinets, providing a beautiful and rustic aesthetic to any space. It has many benefits that make it a great option for updating your kitchen. Farmhouse paint is long-lasting, easy to apply, and relatively inexpensive compared to other types of paint.
It also provides better coverage than regular paints do and is resistant to wear and tear due to its thicker consistency. The matte finish provides excellent protection from moisture and dirt while still allowing the wood grain to show through.
Additionally, farmhouse paint comes in various colors and finishes so you can choose the look that best suits your kitchen. With all these benefits, it’s no wonder why many people choose farmhouse paint for their kitchen cabinets.
Preparing the Cabinets for Painting
Before you begin painting your kitchen cabinets with farmhouse paint, it’s important to properly prepare the surface. Start by thoroughly cleaning the cabinet surfaces with a mild detergent and warm water. Once dry, lightly sand the area to remove any imperfections and smooth out any rough edges.
If necessary, you can use wood filler to fill in any holes or cracks before painting. After that, apply a primer specifically designed for kitchen cabinets and allow it to dry completely before applying the farmhouse paint. You should also use painter’s tape to mask off any areas that you don’t want painted such as door hinges or handles. With these simple steps, you’ll be able to achieve a professional looking finish with your farmhouse paint.
Cleaning the Cabinets

Once the painting is complete, it’s time to clean your cabinets. Regular cleaning helps keep them looking like new and free from dirt, grease and grime. Start by wiping down the cabinet doors with a soft cloth or sponge dampened with warm water and mild soap. You may need to use a small brush to get into any crevices or hard-to-reach areas.
Rinse the surface thoroughly with clean water and dry completely with a soft cloth. Once dry, you can apply furniture polish if desired for extra shine. For more stubborn stains, you may need to use a cleaner specifically designed for kitchen cabinets, such as one containing ammonia or vinegar. Be sure to read the label carefully before using any cleaners on your farmhouse paint finish.
Sanding the Cabinets
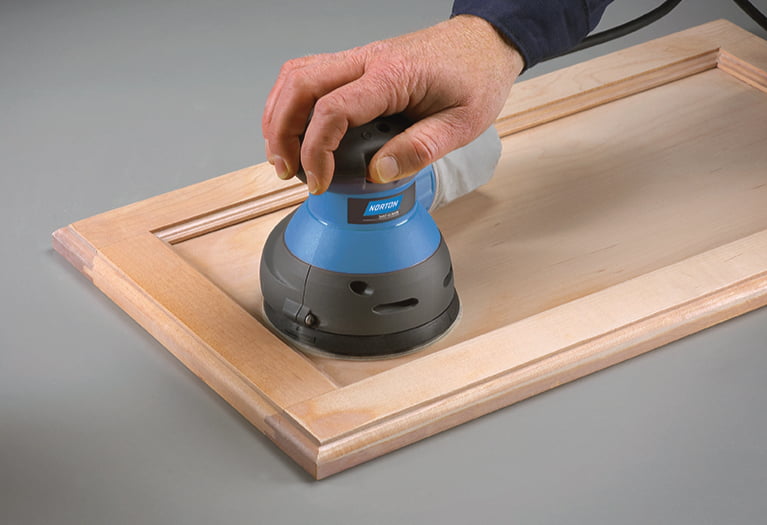
Once the cabinets are clean, it’s time to sand. Sanding is an important part of the prepping process before painting, as it helps create a smooth surface for the paint to adhere to. Start by sanding lightly with a fine-grit sandpaper, then gradually move up to a medium-grit paper. Make sure to wear safety goggles and a dust mask while sanding to protect yourself from any dust particles that may be created.
After you’ve finished sanding, wipe down the cabinet with a damp cloth or sponge and let dry completely before moving on to the next step. Be sure to remove any residue left behind from sanding before beginning your painting project; otherwise, your farmhouse paint finish won’t look its best!
Priming the Cabinets
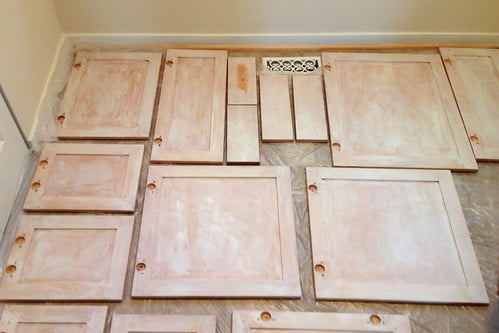
Once the cabinets are sanded and dry, it’s time to prime them. Primer is an important step in painting kitchen cabinets because it helps create a better bond between the paint and the surface of the cabinet. Start by applying an oil-based primer with a brush or roller.
This will help seal any imperfections in the wood and provide a good base for your farmhouse paint. Make sure to cover all surfaces of the cabinets thoroughly, including corners, crevices, and edges. Once you’ve finished priming, let it dry completely before moving on to painting. It’s best to wait at least 24 hours before beginning your project so that your primer has had enough time to set properly.
Selecting a Color for Your Kitchen Cabinets
When selecting a color for your kitchen cabinets, there are many factors to consider. Farmhouse paint colors can range from bright and bold to more muted and subtle shades. To make sure the chosen color will look great in the space, start by looking at the other colors in the kitchen. Consider the walls, floors, countertops, and appliances when deciding on a hue.
If you’re stuck between several colors, try painting swatches directly onto the cabinets and living with them for a few days before making a decision. This will help you get an idea of how they’ll look in natural light as well as under artificial lighting conditions.
Once you’ve settled on a color, double check that it is suitable for use on kitchen cabinets. Some paints may not be durable enough to withstand heat or humidity from cooking activities and need to be avoided.
Benjamin Moore Colors
Benjamin Moore offers a variety of paint colors to choose from for your kitchen cabinets. From bright and bold to more muted and subtle hues, there is sure to be something that suits your taste. Benjamin Moore paints are designed to be highly durable and resistant to the heat and humidity generated by cooking activities.
In addition, they provide excellent coverage in just one coat and come with a range of finishes from matte, satin and glossy so you can customize the look of your cabinets. With so many options available, you can easily find a color that complements the other elements in the kitchen.
Neutral Colors to Consider
Neutral colors are a popular choice when it comes to kitchen cabinets. They can provide a classic and timeless look that won’t go out of style. Neutral colors such as beige, cream, tan and gray can help create a calming atmosphere in the kitchen.
These colors also pair well with other elements of the kitchen such as countertops, appliances and floors. Consider incorporating subtle patterns or textures into your neutral palette to add visual interest without taking away from the overall calming effect.
A great way to do this is by choosing cabinet knobs or handles in different finishes, like brushed nickel or oil-rubbed bronze. With neutral tones, you have plenty of options for creating a beautiful and timeless space in your kitchen.
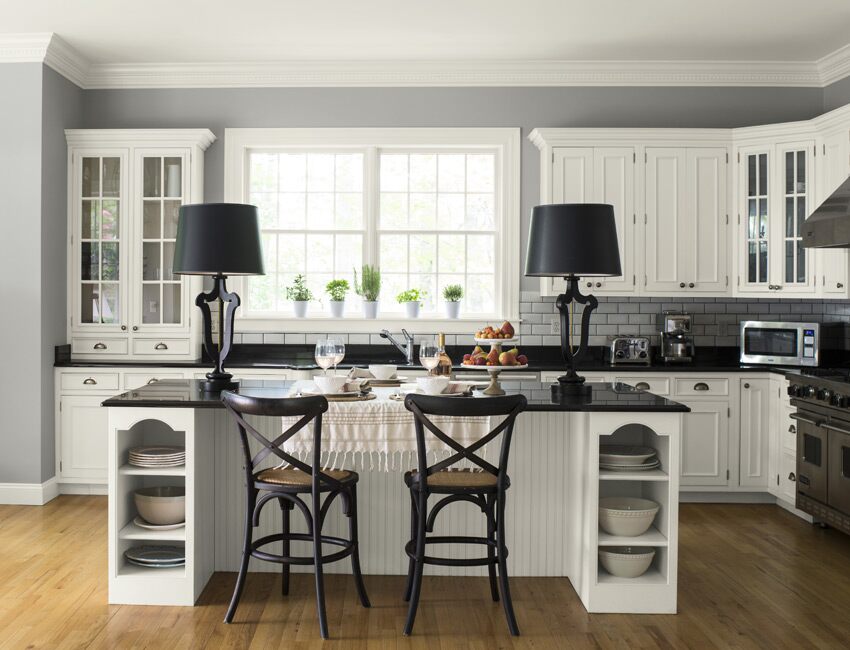
Other White Paint Colors to Consider
White kitchen cabinets are a classic choice that will never go out of style. But if you’re looking to add some pizzazz to the space, there are other shades of white paint that you can use. Off-white colors like ivory, cream and beige can help bring warmth and character to your space.
If you want to make a bolder statement, consider bright whites such as snow or cloud for a modern and contemporary look. For more depth and dimension, try shades with grey undertones like dove or pearl. These colors will create subtle contrast against surrounding surfaces such as countertops and backsplashes.
Or choose a shade like Swiss Coffee for an elegant finish that won’t compete with other design elements in the room. With so many white hues available, the possibilities are endless when it comes to creating a unique and beautiful kitchen design.
Understanding How Many Coats of Paint You Need for Farmhouse Paint on Kitchen Cabinets
Farmhouse paint can be a great choice for kitchen cabinets. However, it’s important to understand the amount of coats of paint needed to achieve the desired finish. Generally, two to three coats are recommended, but this may vary depending on the type and color of paint you choose.
For light colors, two coats are usually sufficient, while darker hues may require additional layers. Additionally, if your cabinets have been previously painted or stained, you may need an extra coat or two for adequate coverage.
Once you’ve applied the appropriate number of coats, make sure to let them dry before adding any hardware or cabinet pulls. With careful application and the right number of layers, you can create a beautiful farmhouse look with your kitchen cabinets that will last for years to come!
Applying Chalk Style Paint to Your Kitchen Cabinets
Chalk style paint is an easy and affordable way to transform your kitchen cabinets. The chalky matte finish gives a shabby chic look that can update any space. Before applying the paint, it’s important to make sure your cabinets are clean and free of grease or dirt.
You may also want to lightly sand them to ensure the paint adheres properly. Once prepped, start by applying a thin layer of primer with a foam roller or brush, then wait for it to dry completely before continuing. For the best results, apply two coats of chalk style paint, allowing each coat to dry before moving on to the next.
Finally, be sure to seal the finished product with a topcoat for added protection against wear and tear. With these steps you’ll have stylish kitchen cabinets in no time!
Milk Paint vs. Chalk Style Paint on Kitchen Cabinets
When it comes to painting kitchen cabinets, two popular options are milk paint and chalk style paint. Both materials offer a unique finish that can add charm and character to your space. Milk paint is a natural product made from milk protein, lime, and pigments. It produces a matte finish that’s slightly chalky and dries quickly.
Chalk style paint has a similar look but is made with synthetic materials for better durability. Its application requires primer and sealant for best results, but the end result is worth the extra effort. Ultimately, both milk paint and chalk style paint can be used on kitchen cabinets–it just depends on the desired look you’re hoping to achieve.
Tips and Tricks for a Perfect Farmhouse Paint Job on Kitchen Cabinets
Farmhouse-style kitchen cabinets are a great way to add character and charm to any cooking space. To get the best results with your farmhouse paint job, you’ll want to make sure you have the right tools and materials. Begin by removing all cabinet doors, drawers, and hardware. Clean surfaces with a degreaser to remove dirt and grease.
Once everything is dry, sand lightly until smooth and then apply a coat of primer. When that’s dry, use a brush or roller to apply two coats of farmhouse paint in even strokes. Finally, use an electric sander for any necessary touch ups before adding a protective sealant or topcoat of paint for extra durability. With these tips and tricks, you can be sure that your farmhouse kitchen will look amazing!
Should You Use Farmhouse Paint on Kitchen Cabinets?
Properly measuring and cutting areas before painting is essential for achieving the desired results when applying farmhouse paint to kitchen cabinets. Masking off these areas can help prevent paint from getting on other surfaces or objects. Choosing the right brush or roller for the job is key, as this will impact how even and consistent the coverage is.
Make sure there is adequate ventilation during painting, as this will help remove any fumes or odors in the air. To ensure you achieve a professional look, it’s best to know when to stop painting so that your cabinetry looks its best. It’s also important to test out the color before applying it everywhere; this way you can be sure it matches the rest of your kitchen decor.
When considering whether to use farmhouse paint on kitchen cabinets, there are pros and cons that should be taken into account. On one hand, using farmhouse paint gives your space a unique and rustic look; however, if not applied correctly it may not last as long as other types of paint. Ultimately, whether you choose to use farmhouse paint on kitchen cabinets is up to you! To see an entire modern farmhouse kitchen renovation in action, check out our blog post today!